💳 Virtual Cards Guide
Virtual cards let you manage multiple budgets separately. Perfect for organizing different money sources or purposes.
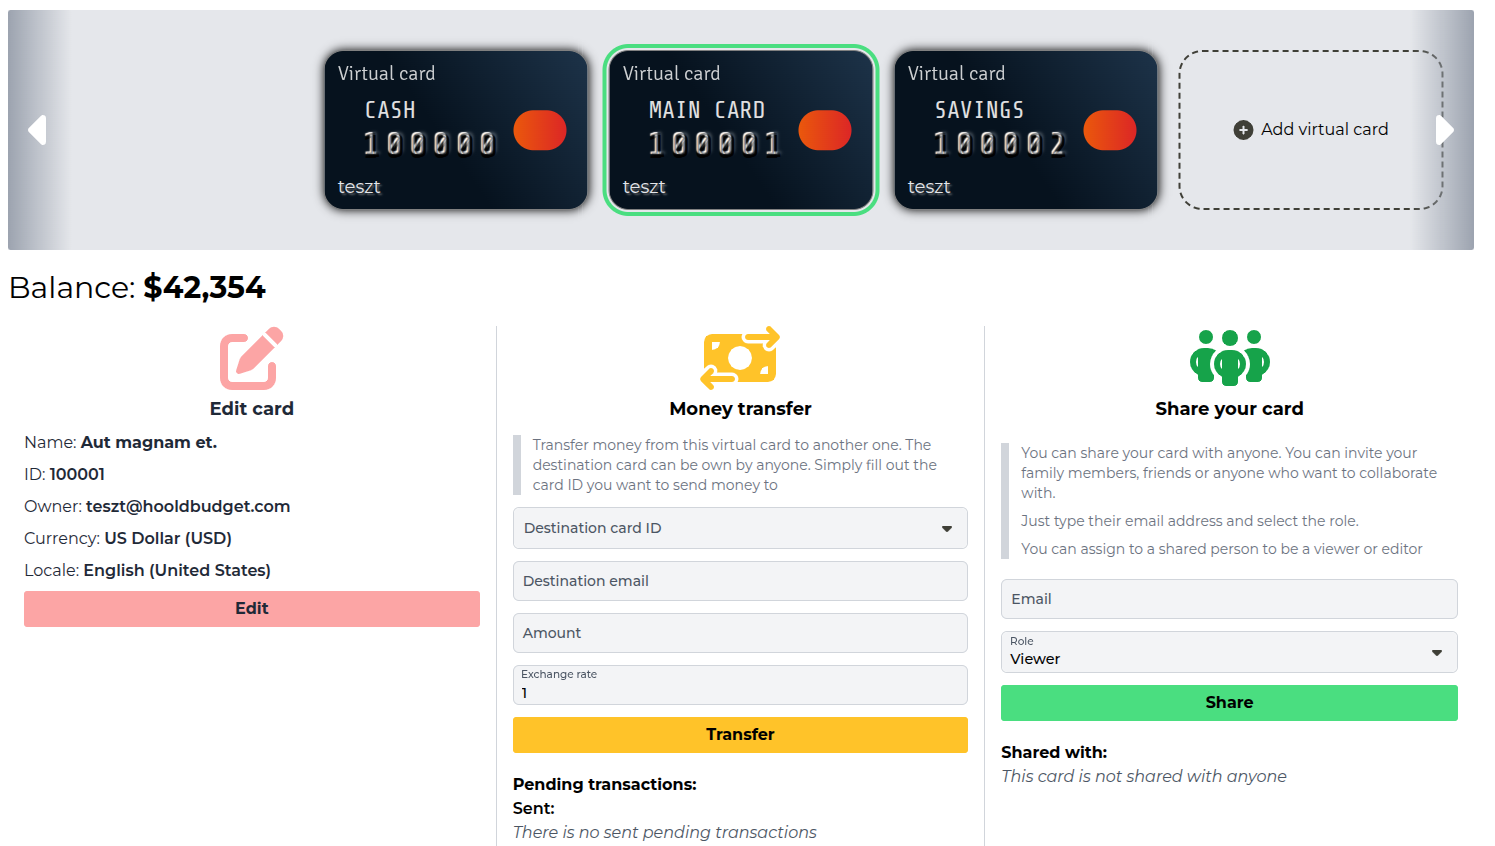
What is a Virtual Card?
A virtual card is a container for your budget. Think of it as a separate wallet or bank account within Hooldbudget. Each card has its own:
- Balance
- Periods
- Groups (categories)
- Transactions
- Currency settings
When to Create Multiple Cards
💵 Cash vs Bank
Separate your cash wallet from your bank card to track each independently.
✈️ Travel Budget
Create a dedicated card for vacation expenses to stay within your travel budget.
👥 Shared Expenses
Share a card with roommates or family for joint household expenses.
💼 Business
Keep business expenses separate from personal spending.
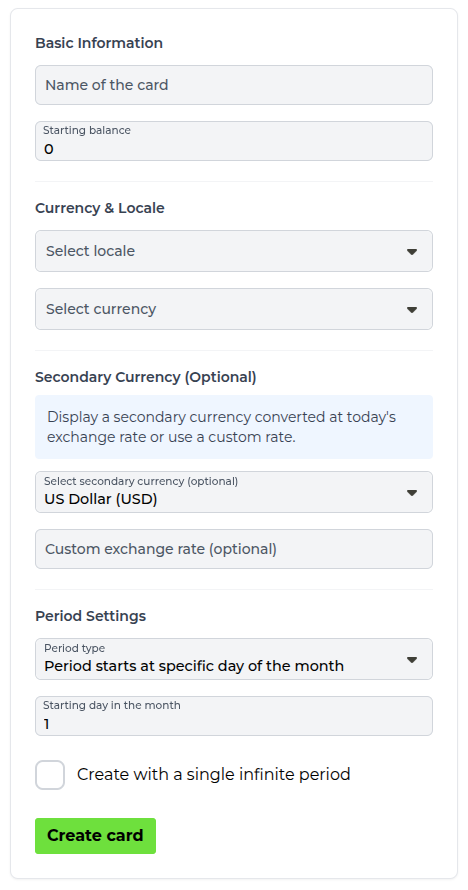
Creating a Virtual Card
Step-by-step:
- Go to Cards page - Click "Cards" in the sidebar
- Click "Create New Card" - Or the "+" button
- Enter card name - e.g., "Cash Wallet", "Travel Fund"
- Set starting balance - Your current amount in this account
- Choose currency - USD, EUR, GBP, etc.
- Select locale - For number formatting (e.g., en-US, de-DE)
- Optional: Secondary currency - View amounts in another currency
- Choose period type - Monthly, custom, or infinite
- Click Create
Card Settings Explained
💰 Starting Balance
Enter how much money you currently have in this account. This becomes your baseline.
💱 Currency
All transactions in this card must use the same currency. Choose the currency you primarily use.
🌍 Locale
Controls how numbers are displayed (e.g., 1,000.00 vs 1.000,00). Choose your region's format.
💵 Secondary Currency (Optional)
Display all amounts in a second currency using real-time exchange rates. Great for travelers or expats.
📊 Custom Exchange Rate (Optional)
Override automatic exchange rates with your own rate for historical or projected conversions.
Sharing Virtual Cards
Share a card with family, partners, or roommates to collaborate on budgets.
How to share:
- Go to Cards page
- Click on the card you want to share
- Click "Share" button
- Enter the email of the person you want to share with
- Choose role: Editor (can modify) or Viewer (read-only)
- Click "Send Invitation"
💡 Tip: Use Viewer role for accountability partners who should see but not change your budget.
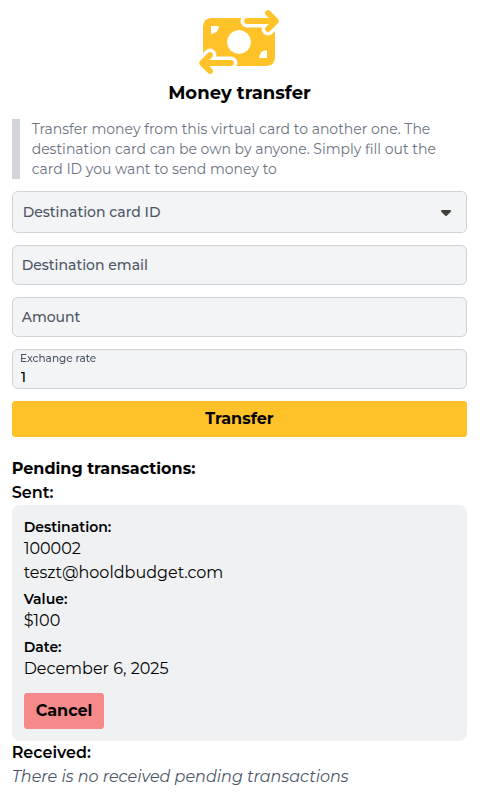
Transferring Money Between Cards
Move money between your virtual cards, just like transferring between real accounts.
How to transfer:
- Go to Cards page
- Click "Transfer" button
- Select source card (from)
- Select destination card (to)
- Enter amount
- Optional: Add exchange rate if currencies differ
- Click "Transfer"
Managing Multiple Cards
Best Practices:
- Start with 1-2 cards, add more as needed
- Use clear, descriptive names
- Keep cards for different purposes (not just different accounts)
- Review all cards weekly to stay on track
- Archive cards you no longer use
Common Use Cases
🏠 Household Budget
Create one card for all household expenses. Share with family members as editors so everyone can log expenses.
💳 Cash + Bank
Two cards: one for cash wallet, one for bank card. Transfer between them when you withdraw cash from ATM.
🎯 Savings Goal
Create a card for a specific savings goal (vacation, car, emergency fund). Track progress separately.
🌍 Multi-Currency
If you earn in one currency but spend in another, create separate cards for each currency.
Ready to Organize Your Budgets?
Create your first virtual card and start tracking your finances.
Create Virtual CardNext Guide:
Periods & Budgeting Guide