🚀 Getting Started with Hooldbudget
Welcome! This guide will help you set up your first budget in just 5 minutes. Let's get started on your journey to better financial management.
⏱️ Time Required: 5 minutes
By the end of this guide, you'll have a working budget and your first transaction logged.
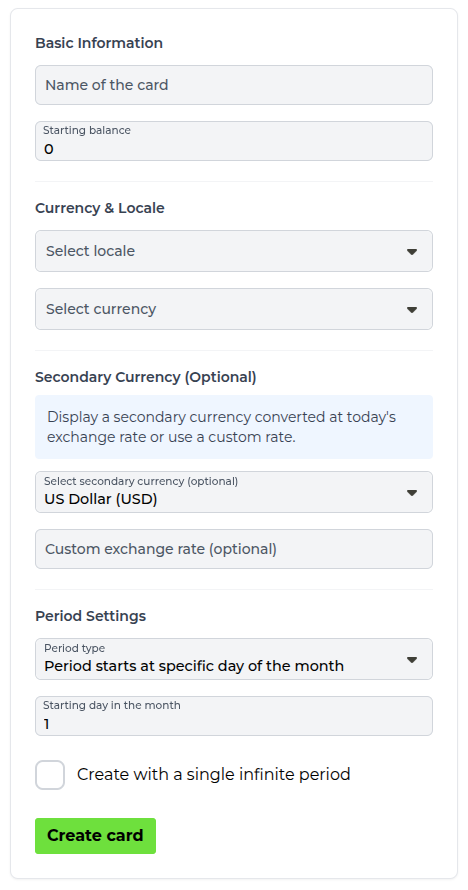
Step 1: Create Your First Virtual Card
A virtual card is like a container for your budget. Think of it as your wallet or bank account.
How to create:
- Click "Start without account" or log in to your dashboard
- Click "Create New Card" or the "+" button
- Enter a name (e.g., "My Wallet", "Main Budget", "Bank Account")
- Set your starting balance (your current money amount)
- Choose your currency and locale
- Select period type (Monthly is recommended for beginners)
- Click "Create"
💡 Tip: Start with one card for your main spending. You can add more cards later for different purposes.
Step 2: Understand Your First Period
After creating your card, Hooldbudget automatically creates your first budgeting period. A period is a time frame for your budget (usually one month).
What you'll see:
- Start Date: Today (or your chosen payday)
- End Date: One month from start date
- Balance: Your starting balance
- Groups: Pre-created expense and income categories
Step 3: Explore Default Groups
Groups help you categorize your spending. Hooldbudget creates default groups to get you started:
📤 Expense Groups
- 🍔 Food
- 🏠 Home
- 👕 Clothing
- 🚗 Transportation
- 🎥 Entertainment
- 🟢 Other
📥 Income Groups
- 📜 Work
You can rename, delete, or add new groups anytime in the Planning page.
Step 4: Log Your First Transaction
Now let's record your first expense or income!
How to add a transaction:
- Click the "+" button (floating action button) or go to Transactions page
- Enter the transaction name (e.g., "Grocery shopping", "Salary")
- Enter the amount
- Select the date (defaults to today)
- Choose a group (e.g., "Food" for groceries)
- Add a note (optional)
- Click "Create"
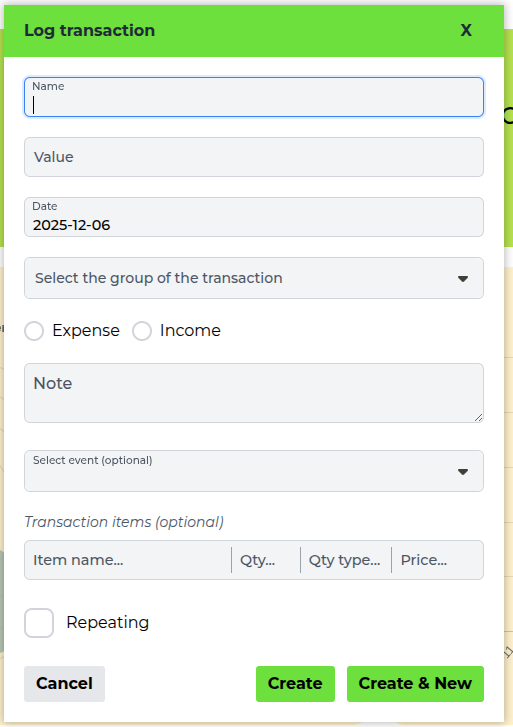
✅ Success! You've logged your first transaction. Your balance will update automatically.
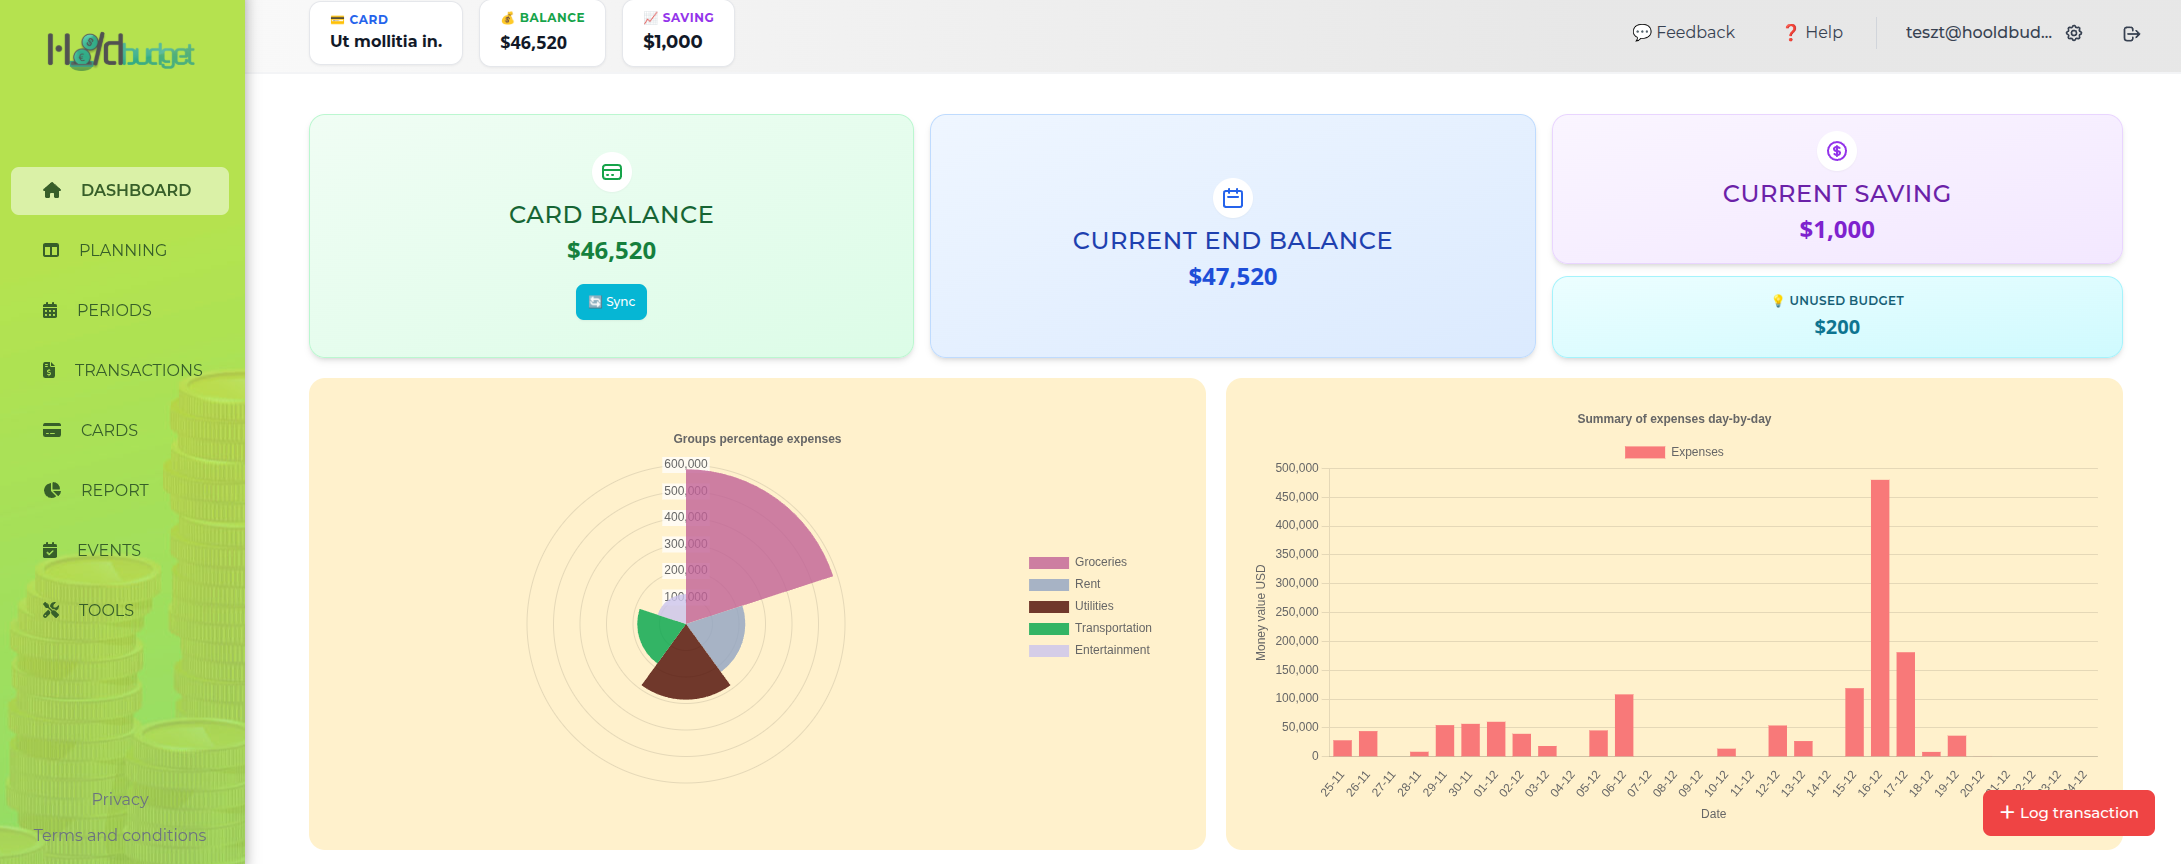
Step 5: Check Your Dashboard
Go to the Dashboard to see your financial overview:
What you'll see:
- Current Balance: Your money after transactions
- Current Saving: Money not allocated to any group
- Period End Balance: Projected balance at period end
- Recent Transactions: Your latest activity
- Charts: Visual breakdown of spending
🎯 Quick Start Checklist
- ✓ Created your first virtual card
- ✓ Understood periods and default groups
- ✓ Logged your first transaction
- ✓ Explored the dashboard
🚀 Next Steps
1. Log More Transactions
Add your recent expenses and income to get a complete picture.
2. Set Budgets
Go to Planning and set budget amounts for each group.
3. Plan Ahead
Create future periods and plan your upcoming expenses.
Need Help?
Explore our other guides to learn more about specific features:
Next Guide:
Virtual Cards Guide